Archive

Tag Archives: Studio

19th December, hand in date.

We were asked to bring our final 5 images in for a group critique where we put our images up on the whiteboard, talk about them and get feedback from our peers and lecturers.

Here are my final 5 images:

White Dress Final 5 193 large White Dress Final 5 250 large White Dress Final 5 351 large White Dress Final 5 427 large White Dress Final 5 439 largeI got some really good positive feedback from the group.  The image of Claire in sitting on the tree branch in the woods seemed to be favourite.

Feedback points seemed to be:

  • Good lighting on location shoot, although the sun on some was harsh.
  • A light behind the model in the tower would have been good to just highlight the hair and give it some texture.
  • Get a bite more movement and variation to poses.

Learning points that i’ve taken from the critique and the project are:

  • Try different colour backgrounds
  • Take a list of different poses for models
  • Take pictures of models in different poses to show models, give them a better idea of what i’m looking for.
  • Have lots and lots of idea’s to try.  Don’t run out, make sure the time is used fully.  Last thing a model wants to do is be standing around, possibly getting cold if outdoors.
  • Make sure I get portrait and landscape shots of each pose, location and setup.
  • Pay more attention to makeup and hair.  I was fortunate with this project in that the fashion students had an idea for each model and just went for it.
  • Pay more attention to small shadows etc in low key images.  Place lights, the model and their limbs very carefully.  Look closely at face, do I need a reflector or extra light to get rid of shadows around eyes, nose etc.

Overall an enjoyable project.  Fortunate to have superb fashion students who were good on communication.  I am really pleased with the images that I shot, especially on location.  I feel my lighting and exposure was good straight off the camera.  We had a wonderful location, which I feel we made the most of with a recce visit before hand to choose locations.  I also felt very comfortable in the studio, especially with the high key lighting.  I have learned a lot and would be happy to do a similar project again.

For the hand in, we are required to submit 5 images.  I have made my choice based on personal preference, peer comments, lecturer comments and feedback from Nicole and Gemma.  I am also aware that the images are for a fashion ‘client’ so made sure that the dress and model are the focus.

For editing, the images need to be sized to be printed on A3 paper.  I have also done some work darkening the backgrounds and enhancing the dress, making sure it is the focal point.  The studio shots needed some cleaning up of the ‘white’ background.  To finish I have added a 1cm border around the edge of each image.

Here are my 5 final images.  Both ‘off the camera’ and in edited form:

I picked this one because it show's the 'wings' of the dress as well as other details.  It's a pose that might be associated with the Charleston dance/ flapper girl image.  A little editing of the background to clean up (right).  I have also got rid of a tattoo on her arm and a few bruises on her legs.

I picked this one because it show’s the ‘wings’ of the dress as well as other details. It’s a pose that might be associated with the Charleston dance/ flapper girl image.  I also like the framing and the shape of the body. A little editing of the background to clean up (right). I have also got rid of a tattoo on her arm and a few bruises on her legs.

Bit of a ‘marmite’ image this one.  Got mixed reactions, so I decided to put it in for that reason.  Simple edits (right).  Try and clean up the background and I put a bit of work into trying to pull the hair away from the mouth.

Bit of a ‘marmite’ image this one. Got mixed reactions, so I decided to put it in for that reason.  I like the pose, I feel that she looks like she’s going to ‘take off’  the ballooned cape also gives the effect of air flowing.  Simple edits (right). Try and clean up the background and I put a bit of work into trying to pull the hair away from the mouth.

Although this doesn't show a lot of the dress detail, it does highlight the headdress, hair and makeup.    Very little work on this one (right).  Slightly darkened and a little highlight of the eyes.

Although this doesn’t show a lot of the dress detail, it does highlight the headdress, hair and makeup.  I felt this was important to show the excellent work that the fashion students had done, aside from the dress.  It is also a different perspective. Very little work on this one (right). Slightly darkened and a little highlight of the eyes.

My favourite shot out of the set.  It shows the dress well and it's detail.  An almost fairytale look.  I have darkened the distracting background light and highlighted the dress (right).

My favourite shot out of the set. It shows the dress well and it’s detail. An almost fairytale look.  The model looks relaxed, in a world of her own looking off into the distance. I have darkened the distracting background light and highlighted the dress (right).

This was my favourite out of this sequence.  The dress was well exposed, so the detail is visible and I like the look of the model almost soaking up the sun.  My edits (below) were to darken the lighter background area's and the turret and slightly highlight the dress.

This was my favourite out of this sequence. The dress was well exposed, so the detail is visible and I like the look and pose of the model soaking up the sun.  A suggested improvement was a light inside the tower to illuminate the hair slightly.  My edits (below) were to darken the lighter background area’s and the turret and slightly highlight the dress.

I picked two images from the location shoot and two images of each dress.  As well as an extra head and shoulders shot.  I am pleased with my selection.

Four hour studio session at college today.  Started off a bit slowly, but steadily gathered momentum.   Got the remote light triggers working perfectly so we could have a high key lighting setup (sort of thing you see with family portraits, bright white background) at the infinity curve end of the studio and a low key (one or two lights, generally dark background, moody) at the opposite end at the same time with a model at each.

Claire, who had modelled Nicole’s dress at the location shoot was available again, but Sylvia wasn’t.  So i’d arranged for one of my work colleagues, Sarah, to model Gemma’s dress.  Unfortunately I got a very apologetic call from Sarah at 8:30am this morning to say that one of her children was sick and could I possibly find someone else to model. Aggghhh!  I emailed the group and Gemma came back pretty quickly and said her friend Danielle could make it, what a star!

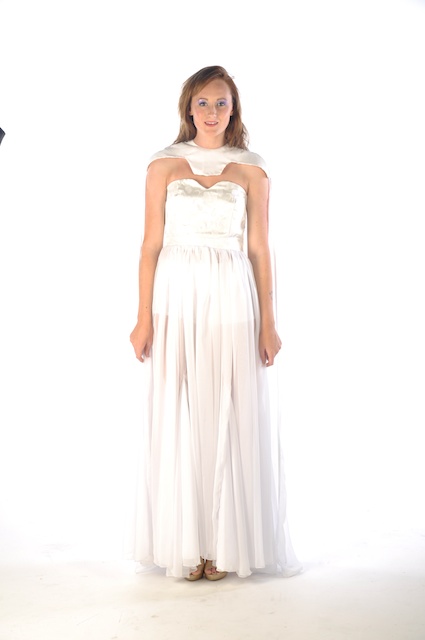
Malcolm, Lindsay and myself got to college around 5pm and started looking at the two lighting setups.  The high key is fairly simple, we used 4 lights, two in front of the model, two behind to light the background.  We set the main ‘key’ light of the front two to be f8, we set the other front light to f5.6 (to get some light shadow and shape to the face and body).  We then set the two lights at the background to f11, to blow it out and make it white.

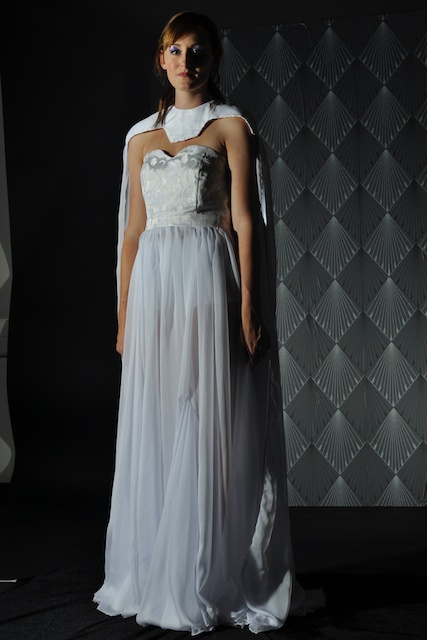
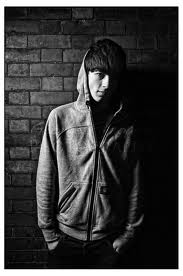
We then took a look at the low key lighting setup.  As I mentioned in the initial meeting Malcolm had found a picture in a magazine that we all liked and wanted to re-create.  It involved a single light illuminating a model, in front of some patterned wallpaper.  Probably more suited to Nicole’s dress, but we thought it was worth trying with both.  Unfortunately we haven’t got the picture anymore, but it was something like this (except with a female model in a dress in front of patterned wallpaper but the lighting is similar):

low key wall example

Malcolm had been very busy during the week, getting wallpaper samples, getting a preference from Nicole and covering a sheet of 8×4 plywood to bring in as a background.  This was put into position and one of us acted as model to get an initial position and strength for the lighting.  We were ready to go!

By about 5:30, both models had arrived and were changed and made up, so we started to shoot.  This was really difficult!  We needed the wallpapered board to be about 3 times wider.  To get the whole dress in the shoot we had to shoot quite wide, but we were getting lots of ‘rubbish’ in the background, i.e. the rest of the studio.

We didn’t want to move the models any closer to the background, because of shadows, so we tried the model standing in front of one edge of the wallpaper, it works quite well.  But we were also having trouble with harsh shadows from the single light.  In hindsight we probably needed a small light or reflector on the opposite side of the model, to lessen the shadows.

Low key studio white dress shadow

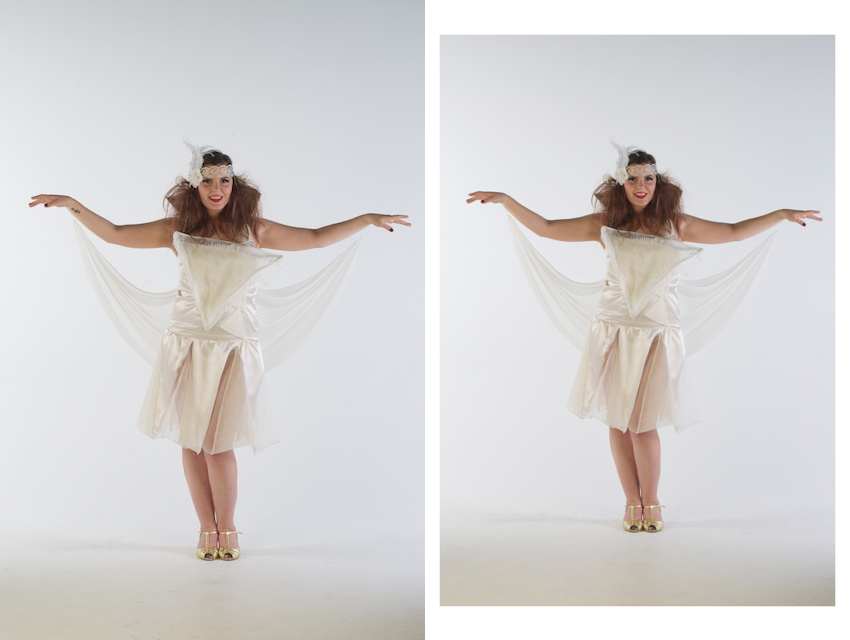
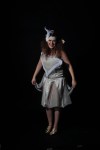
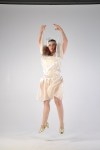
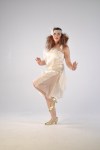
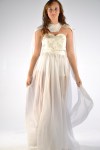
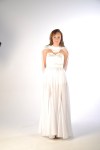
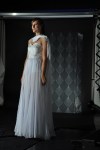
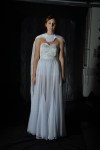
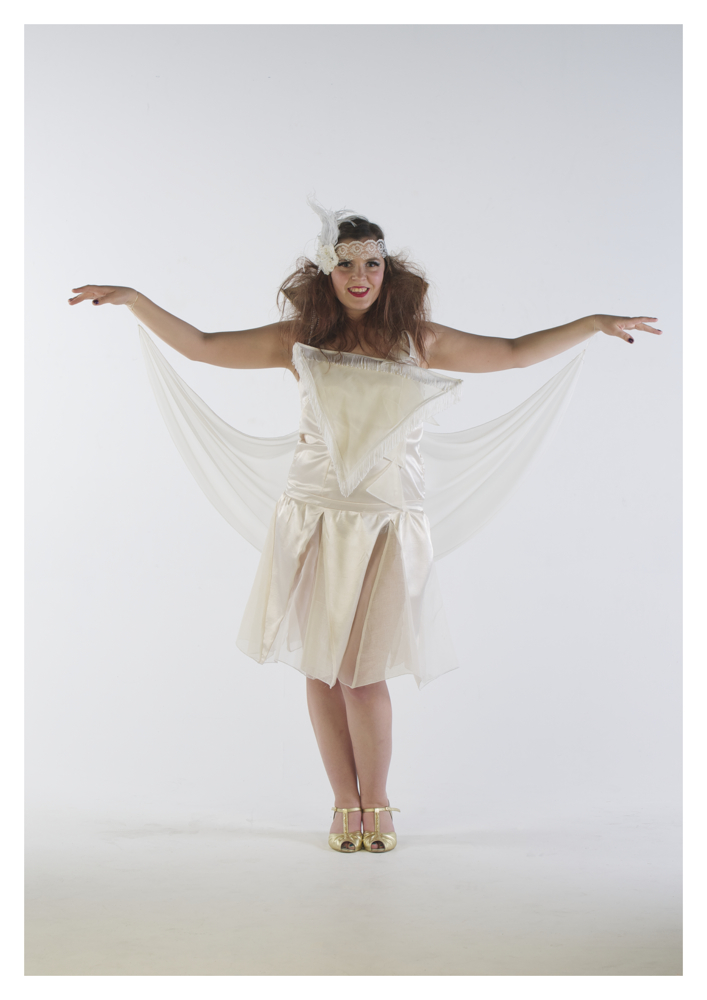
I then went onto the high key lighting setup while Lindsay and Malcolm used the low key.  I was more comfortable with this, there is a lot more scope for movement with less harsh shadows and the worry of a thin background.  I tried some static poses with Danielle:

High Key Studio white dress standing

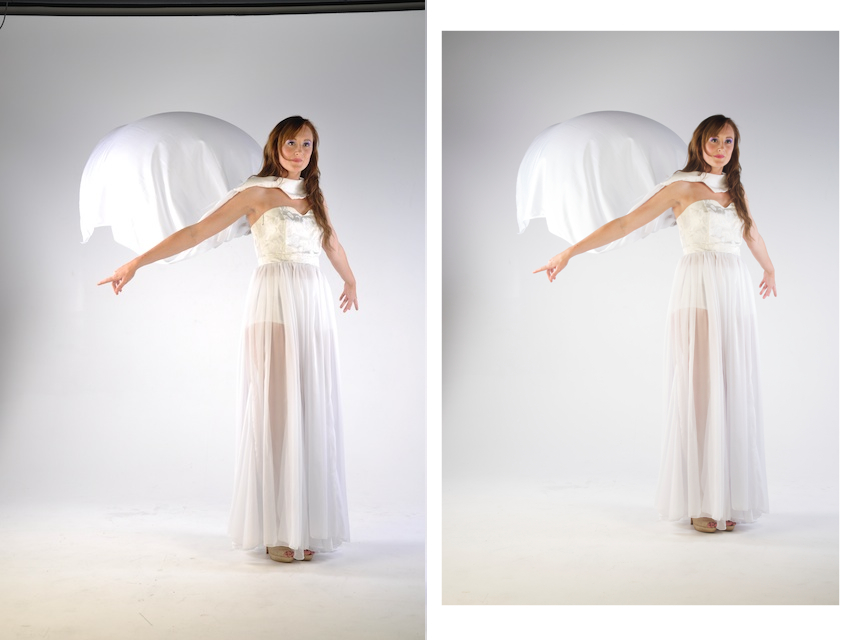
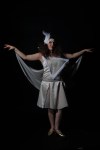
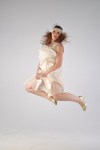
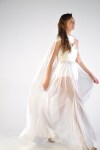
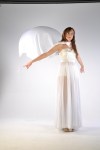
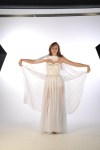
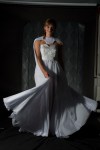
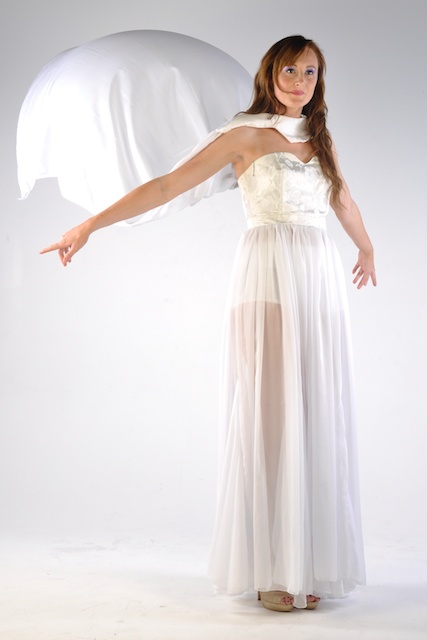
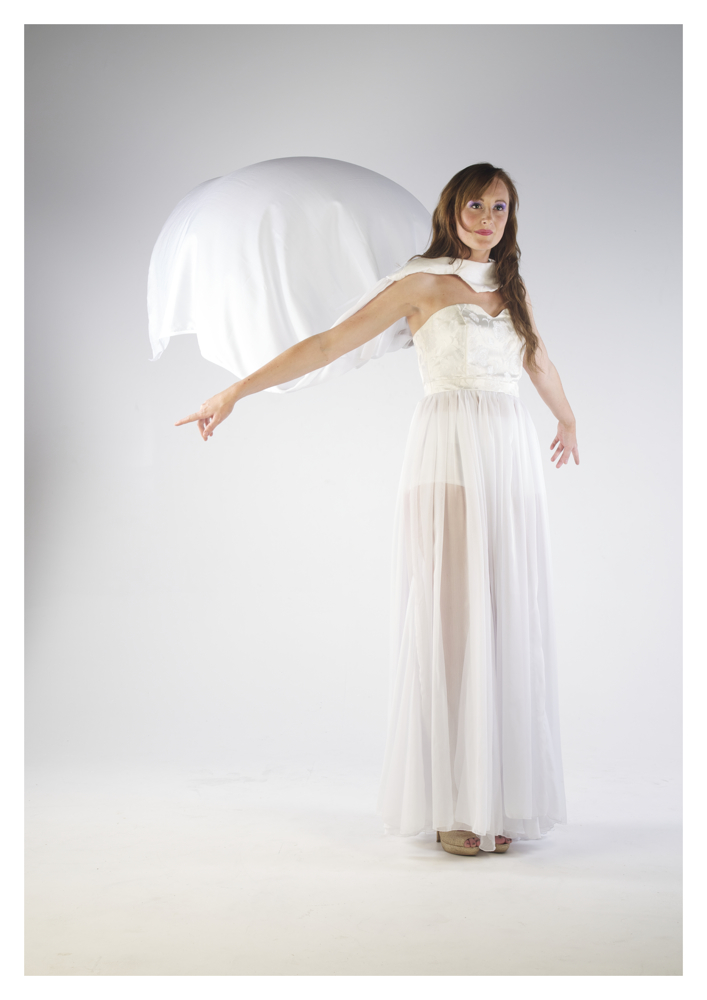
I was quite pleased with this.  But then wanted to get some movement into the dress, make use of all that material.  For this shot I got Malcolm to throw the dress up into the air and then jump out of shot.

High Key Studio white dress ballooned

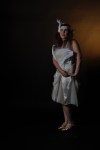
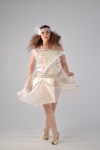
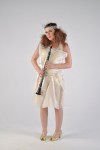
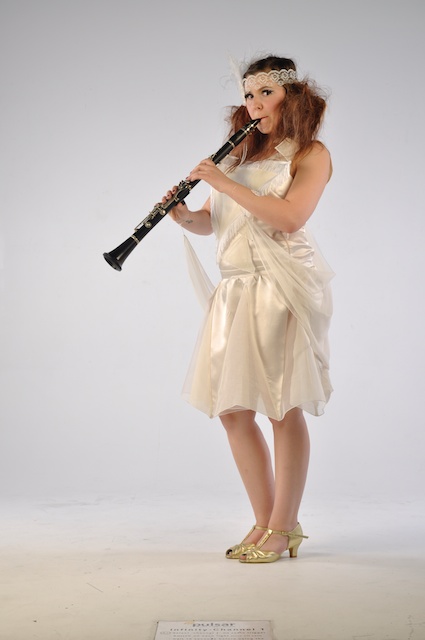
We then swapped and I took a few shots of Claire in the high key setup.  We introduced a clarinet as a prop to start with:

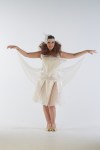
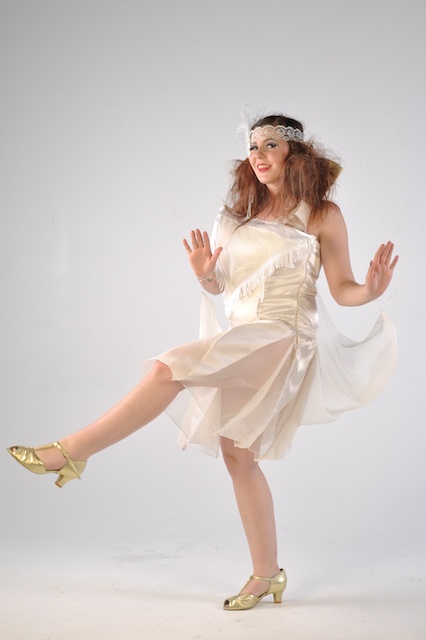
I then asked Claire to use some of her dancing skills and do some Charleston moves:

High Key Studio white dress dancing

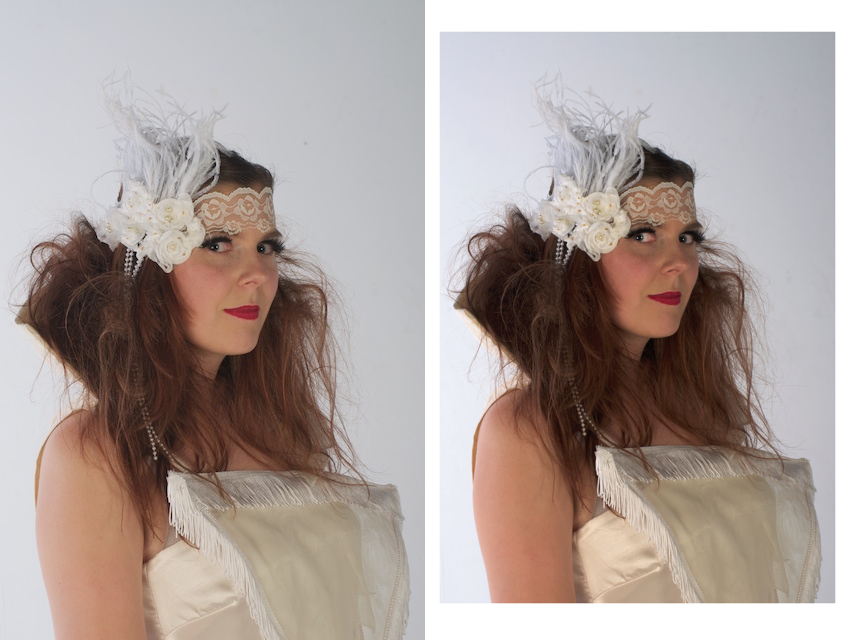
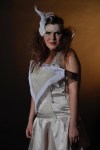
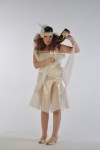
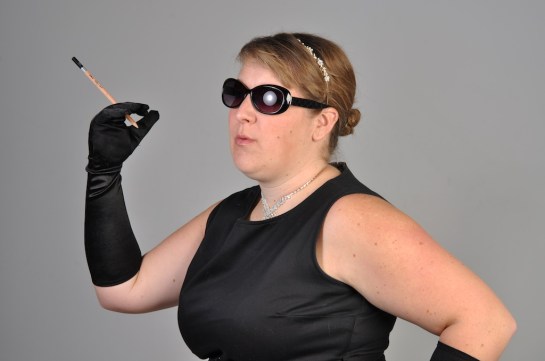
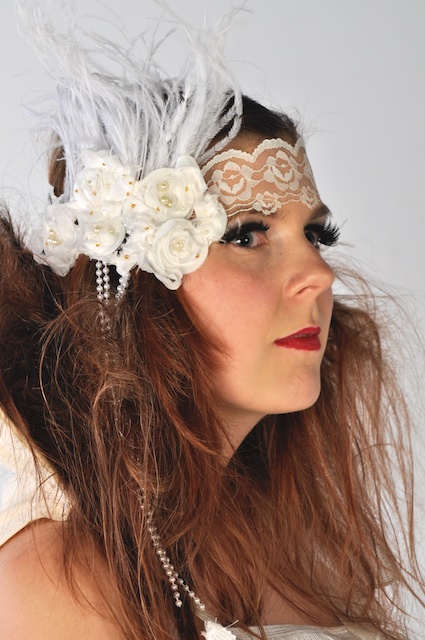
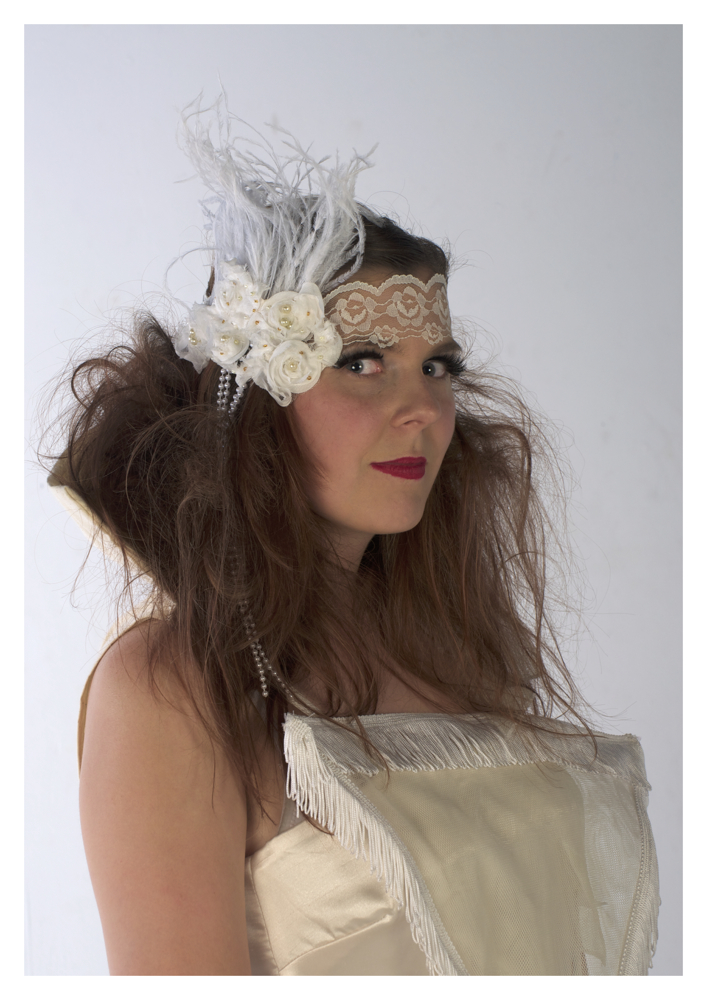
I did a few closeup shots to show off Nicole’s makeup and headdress:

Finally I did a few more shots in the low key setup, where Lindsay had made some changes and added an orange gel:

Again, there were tricky, there were lots of shadows from the triangles on the front.

Everyone was tired by the end, but enjoyed the evening.  Definitely an experience.  The next time I do this I need to have some more idea’s of poses for the models, there were a few times when I ran out of idea’s and the model was left standing.  Claire and Danielle were excellent, but working with professional models may be easier, they may have idea’s and poses that they can bring to future shoots.

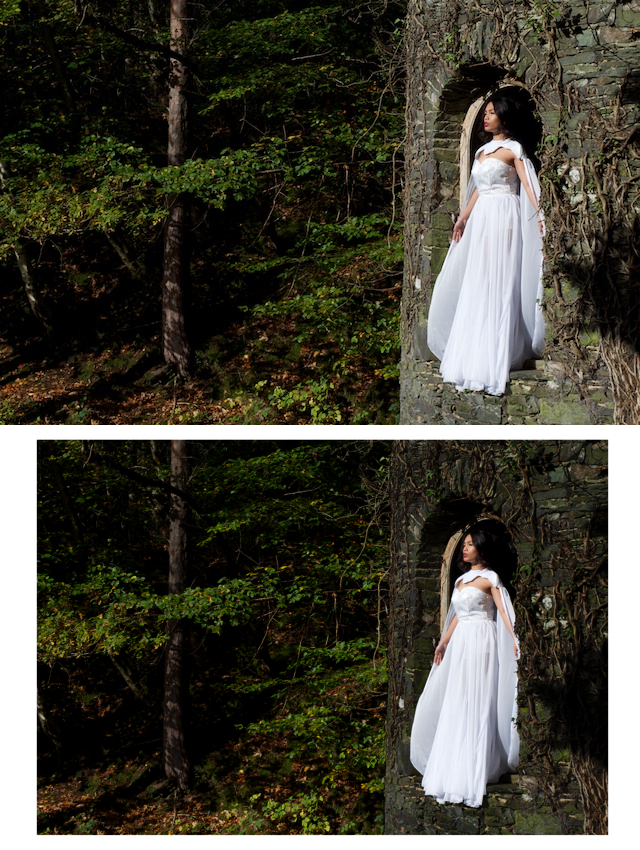
Here is a selection of images from the shoot.  Click on the images for a slideshow and some notes that i’ve made on each one:
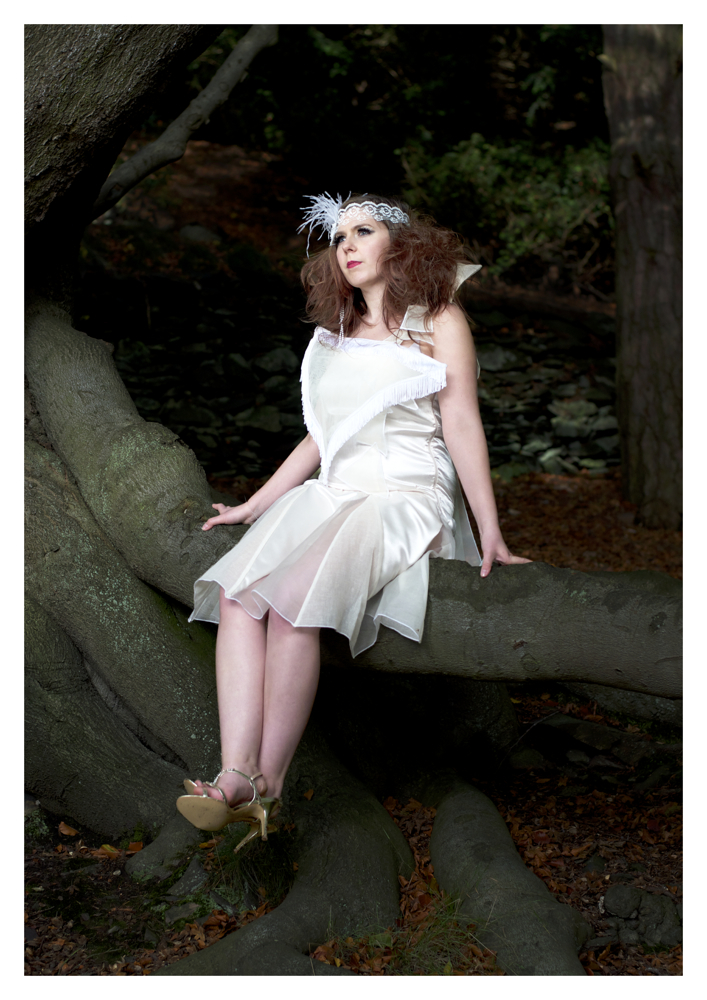
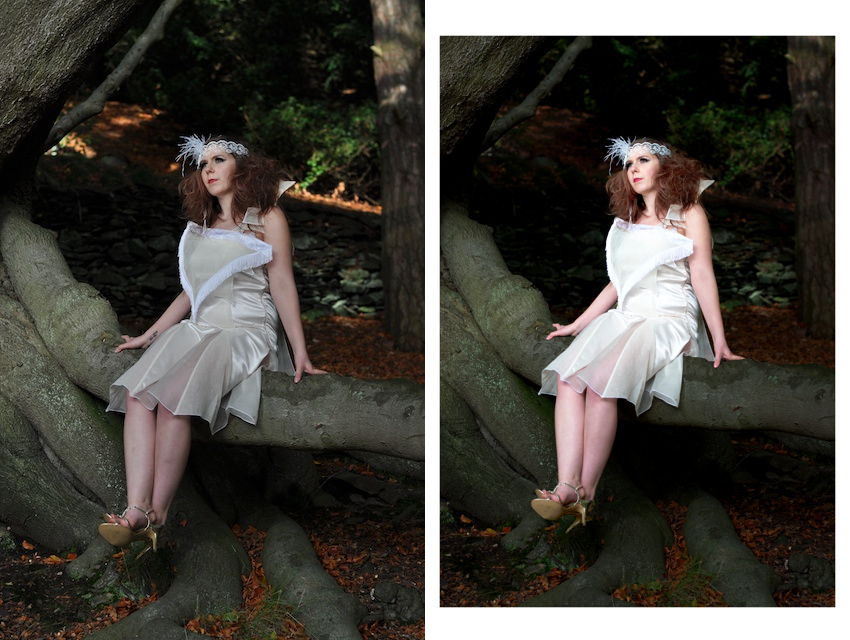
Note: Quick edit, got a Merit for the project, really happy with that!

So, after a pretty successful 1st studio shoot I was keen to make some adjustments and improvements  to my theme.  My main aim was to make the product look bigger and get some champagne in the glasses.

I started without champagne trying to set the shot up.  I really struggled to get what I wanted because the sheet of stainless steel I was using was too short.  I couldn’t get the champagne bottle and glasses far away enough to get the right angle.  Also, because the black cloth on the table and the background on the wall were different blacks I was getting a bit of a striped effect:

Sekonda FS striped (1)

I then tried getting rid of the stainless steel and pulling the black cloth up over an object in the background to give a more consistent colour:

Sekonda black background

These looked better.  It then took me a while to rotate the watch to try and avoid reflections and adjust the position of the champagne bottle of glasses.

I then tried some champagne in the glasses and another student suggested putting lipstick on and drinking of one glass, which was a nice touch.  So my best shot from the day, before ‘photoshopping’ was:

Best Pre PS

After some photoshopping to remove scratches, dust specs and some other adjustments my final image:

Best Post PSI’m still a little frustrated by some of the reflections, but am very happy with my work to remove some of the marks and the dark ‘seksy’ look i’ve given to the watch.

All handed in and awaiting marking now…

One final thing:

At the end of the shoot, after sampling the champagne.  We decided a shot of the watch on the stainless steel, surrounded by champagne would look nice:

Seksy ChampagneWe we’re quite pleased in the end!

Our next HNC photography project is studio based.  Sekonda have lent the college a selection of prototype watches.  These were randomly allocated to us.  We have to then take a shot to go in a fictitious Argos pullout.

Below is a selection of my favourites from my first shoot:

Watch 1st Shoot 1

I think this is my favourite shot so far. Need have have some bubbly in the glasses though. Might also try and ‘compress’ it all a bit, get things a bit closer together so the watch is more prominent. Seeing as that’s what i’m advertising.

Watch 1st Shoot 2

I quite like the ‘dreamy’ look of this shot. Although it is a little boring and doesn’t tell much of a story about the watch. Seeing my camera reflection in the watch face is also a little frustrating.

Watch 1st Shoot 3

Really should have wiped the stainless steel first, you can see all of the little specs of dust!

Watch 1st Shoot 4